Notices for Simplified Structural Design of Machined Parts (Plane Grinding or Fine Planing)
Most metal mechanical parts are machined before they are officially used in order to be put into use. This is the last step before the assembly of mechanical parts. Therefore, the quality and cost of machining have a great impact on the quality and cost of mechanical parts and the entire machine. Therefore, in the design process, the machining process must be considered.
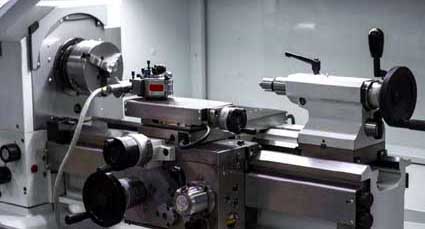
Especially for some special mechanical parts, the manufacturing process is often very special, and special consideration should be given to the design. Whether a part can be manufactured can be a decisive factor in whether a design can be adopted. Therefore, when designing the structure of these machined parts, the following issues need to be noted.
1. Structure design of parts for saving materials
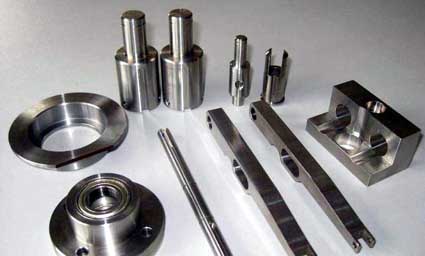
Pay attention to reducing the blank size. The flange is made of round steel directly. If the design has a maximum diameter of 100mm, it should be processed with round steel of 105mm or 110mm. If the design has a maximum diameter of 98mm, it can be processed with 100mm steel, which can save a lot of steel.
2. Structural design to reduce the amount of machining work
(1) Take into account the influence of casting error
The error of cast parts is relatively large and must be fully considered when designing the casting surface. For example, the bearing end cover matches the boss on the box body, but the position of the boss on the box body is difficult to be very accurate. If the diameter of the end cap flange is designed to be exactly equal to that of the convex platform, the protrusion of the end cap beyond the convex platform will often occur due to the influence of casting errors. Therefore, the diameter of the cast boss should be larger.
(2) Surfaces with different machining accuracy should be processed separately
When the two surface roughness requirements are different, there must be a clear boundary between the two surfaces. This is not only easy to process, but also beautiful in shape.
3. Reduce the structural design of manual processing or supplementary processing
(1) Replacing manual grinding with plane grinding
The guideway of the universal tool microscope of large optical metrology instrument was originally designed as circular guideway, which was used for manual grinding, and then modified to flat V guideway. It was processed by a surface grinder, and the productivity was greatly improved.
(2) Replace the scraper box with the surface grinder or fine planer
The split surface of the split type gearbox case requires a high degree of flatness. It turns out that some production units use manual scraping, which has a large workload and low productivity. Later, it was changed to a surface grinder to process live fine planers.
4. Simplify the shape and requirements of the machined surface
(1) The non-circular parts must be avoided with the stop fit. There is a flange on the surface of the box part to match it. In order to make the positioning of the cover accurate. In addition to fixing with screws, it is designed with a stop fit. The matching hole should be round, and it is not suitable to use other shapes such as a rectangle, a square, an ellipse or the like.
(2) must be full of complex shape parts chamfering
Chamfering of complex shaped parts is difficult. Such as elliptical complex shapes, it is difficult to chamfer by mechanical processing, chamfering by hand, it is difficult to guarantee the quality of processing.
5. Structure design of parts for easy clamping and measurement
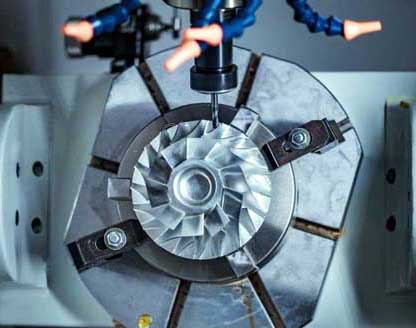
To avoid the structure of the parts that cannot be clamped, the mechanical parts must be clamped on the machine during machining, so the parts must be easily clamped on the mechanical parts. In addition, the clamping parts must have sufficient support to ensure that the parts do not shake under the action of cutting forces. Therefore, the part has sufficient rigidity to avoid clamping deformation.
6, to avoid cutting tools in the unfavorable conditions
The tool can easily enter or exit the machined surface. When the tool enters or exits the machined surface, it requires a certain amount of movement space. The design should retain enough clearance.
7. Correctly handle the structure of the shaft and the hole (inner and outer surfaces)
Complex machining surfaces are designed on the outer surface rather than on the inner surface, and shaft parts are easier to machine than holes.
Therefore, when two axes and hole-shaped parts are fitted together, and there are some more complex structures among them, it is often better to design these structures on the axle than on the inner surface of the hole.

Especially for some special mechanical parts, the manufacturing process is often very special, and special consideration should be given to the design. Whether a part can be manufactured can be a decisive factor in whether a design can be adopted. Therefore, when designing the structure of these machined parts, the following issues need to be noted.
1. Structure design of parts for saving materials
Pay attention to reducing the blank size. The flange is made of round steel directly. If the design has a maximum diameter of 100mm, it should be processed with round steel of 105mm or 110mm. If the design has a maximum diameter of 98mm, it can be processed with 100mm steel, which can save a lot of steel.

2. Structural design to reduce the amount of machining work
(1) Take into account the influence of casting error
The error of cast parts is relatively large and must be fully considered when designing the casting surface. For example, the bearing end cover matches the boss on the box body, but the position of the boss on the box body is difficult to be very accurate. If the diameter of the end cap flange is designed to be exactly equal to that of the convex platform, the protrusion of the end cap beyond the convex platform will often occur due to the influence of casting errors. Therefore, the diameter of the cast boss should be larger.
(2) Surfaces with different machining accuracy should be processed separately
When the two surface roughness requirements are different, there must be a clear boundary between the two surfaces. This is not only easy to process, but also beautiful in shape.
3. Reduce the structural design of manual processing or supplementary processing
(1) Replacing manual grinding with plane grinding
The guideway of the universal tool microscope of large optical metrology instrument was originally designed as circular guideway, which was used for manual grinding, and then modified to flat V guideway. It was processed by a surface grinder, and the productivity was greatly improved.
(2) Replace the scraper box with the surface grinder or fine planer
The split surface of the split type gearbox case requires a high degree of flatness. It turns out that some production units use manual scraping, which has a large workload and low productivity. Later, it was changed to a surface grinder to process live fine planers.
4. Simplify the shape and requirements of the machined surface
(1) The non-circular parts must be avoided with the stop fit. There is a flange on the surface of the box part to match it. In order to make the positioning of the cover accurate. In addition to fixing with screws, it is designed with a stop fit. The matching hole should be round, and it is not suitable to use other shapes such as a rectangle, a square, an ellipse or the like.
(2) must be full of complex shape parts chamfering
Chamfering of complex shaped parts is difficult. Such as elliptical complex shapes, it is difficult to chamfer by mechanical processing, chamfering by hand, it is difficult to guarantee the quality of processing.

5. Structure design of parts for easy clamping and measurement
To avoid the structure of the parts that cannot be clamped, the mechanical parts must be clamped on the machine during machining, so the parts must be easily clamped on the mechanical parts. In addition, the clamping parts must have sufficient support to ensure that the parts do not shake under the action of cutting forces. Therefore, the part has sufficient rigidity to avoid clamping deformation.
6, to avoid cutting tools in the unfavorable conditions
The tool can easily enter or exit the machined surface. When the tool enters or exits the machined surface, it requires a certain amount of movement space. The design should retain enough clearance.
7. Correctly handle the structure of the shaft and the hole (inner and outer surfaces)
Complex machining surfaces are designed on the outer surface rather than on the inner surface, and shaft parts are easier to machine than holes.
Therefore, when two axes and hole-shaped parts are fitted together, and there are some more complex structures among them, it is often better to design these structures on the axle than on the inner surface of the hole.


