CNC Machining Process
Processing Principles
(1) the processing of the above working procedure can not affect the positioning and clamping of the next working procedure.
(2) First inside and outside, That is, the inner cavity (inner hole) is processed first, and then the outer shape is processed.
⑶ Processes that are processed by the same tool or the same tool are preferably carried out continuously to reduce errors caused by repositioning or tool changing.
(4) In the same installation, the process that has little effect on the rigidity of the workpiece should be performed first.
Processing route
The CNC lathe feed processing route means that the turning tool begins its movement from the tool setting point (or the fixed origin of the machine tool) until it returns to that point and ends the machining program. Path through, including knives Cut in, cut out and a non-cutting free travel path.
The feed path for finishing is basically carried out along the outline of its parts. Therefore, the main focus of determining the feed path is to determine the feed route for roughing and empty travel.
In CNC lathe processing, the determination of processing routes generally follows the following principles:
1. The accuracy and surface roughness of the workpiece to be machined should be guaranteed.
2. Minimize the processing route, reduce the idle travel time, and improve the processing efficiency.
3. Simplify the workload of numerical calculation as much as possible and simplify the processing procedure.
4. For some programs reusable, use subroutines.
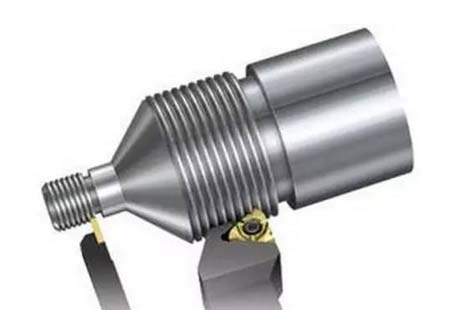
Making the processing program have the shortest feeding route not only saves the execution time of the entire machining process, but also reduces unnecessary tool consumption and wear of sliding parts of the machine feed mechanism. The type of shortest route and its implementation are as follows:
(1) The shortest cutting feed route. The shortest cutting feed path can effectively increase production efficiency and reduce tool wear. When arranging the shortest cutting feed route, it is also necessary to ensure the rigidity and workability of the workpiece.
(2) The shortest noncutting stroke route.
Using knife points. Generally rectangular loop exemplary manner roughing. The tool point A is set in consideration of the need for a convenient tool change during the finishing process, and therefore is set at a position far from the blank, At the same time, the starting point coincides with the tool point.
Set up a tool change point skillfully. In order to consider the convenience and safety of tool change, sometimes the tool change point is also set at a distance from the blank part.
At the location, then, when the second knife is changed, the course of noncutting stroke during finishing is bound to be longer; If the tool change point of the second knife is also set in the middle point position, the noncutting stroke distance can be shortened.
Reasonably arrange the "zero return" route. When manually compiling complex contour machining programs, the calculation process is simplified for easy verification. The programmer sometimes sets the end point of the tool after each tool is processed, By executing a "return to zero" operation instruction, all of them are returned to the position of the tool-cutting point, and then the subsequent program is executed. This will increase the distance of the feeding route and reduce the production efficiency. Therefore, the distance between the end point of the previous knife and the starting point of the next knife should be as short as possible when the “zero return” route is reasonably arranged. Or zero to meet the shortest requirements of the feed route. In addition, when choosing to return to the tool-cutting point instruction, the two-way simultaneous “return-to-zero” instruction of the x-axis and z-axis is used as far as possible without interference, and the “return-to-zero” route of this function is the shortest.
(3) Large margin rough ladder cutting feed line. The cutting feed routes of two kinds of large blank are listed. It is the wrong step cutting line, cutting in the order of 1 bucket 5, the remaining amount of each cutting is equal, it is the correct step cutting feed route. Because of the same back engagement of the cutting edge.
(4) Continuous cutting feed path for part contour finishing. The finishing of part contours can be arranged with one or several knife finishing operations. Its finished profile should be continuously machined from the last knife. At this time, the position of the tool should be selected properly. Try not to arrange cut in and cut out or change tools and pauses in continuous contours. So as to avoid sudden changes in cutting force and destroy the balance of process systems. This results in scratches, sudden changes in shape, or stagnation of the parts on the contour of the part.
(5) Special feed routes. In CNC turning, under normal circumstances. The longitudinal feed of the tool is fed along the negative direction of the coordinates. However, it is sometimes unreasonable to arrange a feeding route in its usual negative direction. It may even damage the workpiece.
Advantages and disadvantages
CNC machining has the following advantages:
1. The number of frocks is greatly reduced, and parts with complex shapes do not require complicated frocks. If you want to change the shape and size of parts, you only need to modify the parts processing program, which is suitable for the development and modification of new products.
2. The processing quality is stable, the processing precision is high, and the repeat accuracy is high, and it can meet the processing requirements of the aircraft.
3. The high production efficiency in the case of multi-variety and small-batch production can reduce the time for production preparation, machine tool adjustment and process inspection, and reduce the cutting time due to the use of the optimum cutting amount.
4. Machinable complex surfaces that are difficult to process with conventional methods can be machined, and even machined parts that are not observable can be machined.n The disadvantage of CNC machining is that machine tool equipment is expensive and requires maintenance personnel to have a high level.
Tool Selection
1, choose the principle of CNC tool
Tool life is closely related to the amount of cutting. When setting the cutting amount, a reasonable tool life should be selected first, and a reasonable tool life should be determined according to the optimization goal. It is generally divided into the highest productivity tool life and the lowest cost tool life. The former is determined based on the goal with the least amount of work time per unit and the latter is determined based on the goal with the lowest process cost.
Tool life depending on the complexity of the tool, the manufacturing and the cost of sharpening.
The complex and high-precision tool life should be selected to be higher than the single-edged tool. For the machine tool with indexable tools, due to the short tool change time, in order to give full play to its cutting performance and improve the production efficiency, the tool life can be selected to be lower, generally take 15-30min.
For multi-knife, machine tool and automated machining tools that are more complex for tool loading, tool change and tool adjustment. The tool life should be selected higher, and in particular tool reliability should be ensured.
When the productivity of a certain process in a workshop limits the productivity of the whole workshop, the tool life of the process is selected to be lower. When the expenditure of the whole plant shared by a certain process unit unit time is relatively large, the tool life should also be selected lower.
In the case of large-scale finishing, in order to ensure that at least one pass is to be performed to avoid mid-tool change during cutting, the tool life should be determined according to the part accuracy and surface roughness.
Compared with the ordinary machine tool processing method, the numerical control processing puts forward higher requirements on the tool, not only needs a good, high precision, but also requires a stable size, high durability, The disconnection and row performance also require easy installation and adjustment to meet the high efficiency requirements of CNC machine tools. The tools selected for CNC machine tools are often used for high-speed cutting tool materials (such as high-speed steel, ultra-fine grained carbide) and use indexable inserts.
2, Choose the tool for CNC turning
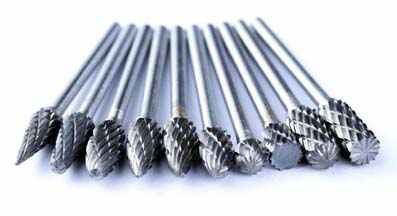
CNC lathe turning tool commonly used general points: forming lathe tool, sharp turning tool, arc turning tool and five kinds.
Molding turning tools are also called model turning tools. The contour shape of the machining parts is completely determined by the shape and size of the turning edge of the turning tool.In CNC turning, common turning tools include small-radius arc cutters, non-rectangular slot cutters, and thread cutters.In CNC machining, the Molding tool should be used as little or as little as possible.
The sharp turning tool is a turning tool characterized by a straight cutting edge. The tip of a turning tool of this type consists of straight main and auxiliary cutting edges. The internal and external turning tool 900, the left and right end face turning, grooving (cutting) tools and a variety of small chamfered tip and the cylindrical hole tools.The method of selecting the geometric parameters (mainly geometric angles) of the sharp turning tool is basically the same as that of ordinary turning.
However, comprehensive consideration should be given to the characteristics of CNC machining (such as processing routes, processing interference, etc.), and the strength of the tool tip itself should be taken into account.
3, Select the tool for CNC milling
In the numerical control machining, the inner and outer contours of the milling plane parts and the milling plane are commonly used flat bottom end mills. The empirical data of the relevant parameters of the tool are as follows:
One is that the cutter radius RD should be smaller than the minimum radius of curvature Rmin of the inner contour surface of the part, generally taking RD=(0.8-0.9)Rmin.
The second is the processing height of the part H<(1/4-1/6)RD to ensure that the knife has sufficient rigidity.
Third, when milling the bottom of the inner groove with a flat-bottom end mill, the bottom edge of the groove needs to be overlapped by two passes, and the radius of the cutting edge of the tool Re=R-r, that is, the diameter is d=2Re=2(R-r), The radius of the tool is taken as Re=0.95 (Rr) when programming.
For some three-dimensional surface and variable angle profile processing, spherical milling cutters, ring milling cutters, drum milling cutters, conical milling cutters and disc milling cutters are often used.
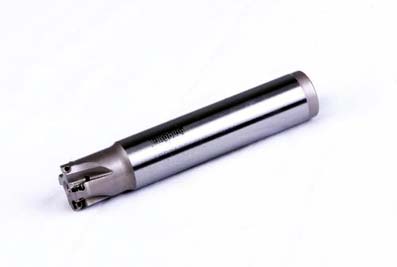 Most of CNC machine tools use serialized and standardized tools, and the national standard and serialized models are available for the tool holders and cutter heads of the indexable machine tools such as the external turning tool and the face turning tool.For machining centers and machine tools with automatic tool changer, the tool holders have been serialized and standardized. For example, the standard code for the taper shank tooling system is TSG-JT, and the standard code for the straight shank tooling system is DSG-JZ.
In addition, for the selected tool, the tool size must be strictly measured to obtain accurate data before use. The operator enters this data into the data system and completes the machining process by calling the program, thereby producing a qualified workpiece.
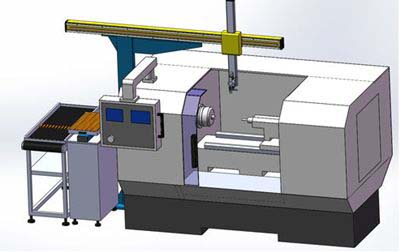
Knife point
From where did the tool start to move to the specified position?
Therefore, at the beginning of program execution, the position of the tool in the workpiece coordinate system must be determined. This position is the starting point of the tool relative to the workpiece during program execution. So it is called the starting point of the program or the point of the knife.
This starting point is generally determined by the knife, so this point is also called the knife point. When programming, it is necessary to correctly select the position of the tool point. The principle of setting tool points is to facilitate numerical processing and simplify programming. Easy to correct and easy to check during processing; resulting in small machining errors. The tool-cutting point can be set on the machined part, or on the fixture or the machine tool. In order to improve the machining accuracy of the part, the tool-cutting point should be set as far as possible on the design basis of the part or the process base.
When the machine tool is actually operated, the knife position of the tool can be placed on the tool setting point by manually setting the tool. That is, the "knife location" and the "cutting point" coincide.
The so-called "knife location" refers to the tool's positioning reference point. The turning tool's tool location is the tool nose or the tool nose arc center.
The flat end milling cutter is the intersection point the tool axis and the tool bottom surface; the ball end milling cutter is the ball center of the ball head, and the drill bit is the drill point.
With manual knife operation, the accuracy of the tool is low and the efficiency is low. Some factories use optical alignment tool, tool aligner and automatic tool setting device to reduce tool setting time and raise the accuracy of tool setting.
When a tool change is required during machining, the tool change point should be specified. The so-called "tool change point" refers to the tool change position when the holder is rotated, the tool change should be located outside the workpiece or fixture, do not touch the workpiece and the other to tool change components shall prevail.
Cutting amount
In NC programming, the programmer must determine the amount of cutting for each process and write the program in the form of instructions. Cutting rates include spindle speed, depth of cut, and feed rate. For different processing methods, different cutting amounts need to be selected. The selection principle of cutting amount is to ensure the precision and surface roughness of the part and fully exploit the cutting performance of the tool. Ensure a reasonable tool life and give full play to the machine's performance, maximize productivity and reduce costs.
1, Determine the spindle speed
The spindle speed should be selected based on the allowable cutting speed and the workpiece (or tool) diameter. Its calculation formula is: n = 1000 v/7 1D Type: v? Cutting speed, unit is m/m moving, decided by the tool's durability; n One spindle speed, in r/min, D is the workpiece diameter or tool diameter in mm. Calculate the spindle speed, n, and finally select the machine's own or nearer speed.
2, Determine the feed rate
The feed rate is an important parameter in the cutting amount of CNC machine tools. It is mainly selected based on the machining accuracy and surface roughness requirements of the parts and the material properties of the tools and workpieces. The maximum feed rate is limited by the stiffness of the machine and the performance of the feed system.
The principle of determining the feed rate: When the quality requirements of the workpiece can be guaranteed, in order to increase the production efficiency, a higher feed rate can be selected. Generally within the range of 100 to 200mm/min;
When cutting, processing deep holes or machining with high-speed steel tools, lower feed rates should be selected, generally within the range of 20 to 50 mm/min;
When the processing precision and surface roughness requirements are high, the feed speed should be chosen smaller, generally within the range of 20--50mm/min;
When the tool is idle, especially when it is "return to zero" at a long distance, the highest feedrate set by the machine's numerical control system can be set.
3, Determine the depth of cut
The depth of cut is determined by the stiffness of the machine, the workpiece and the tool. When the stiffness allows, the depth of cut should be equal to the machining allowance of the workpiece as much as possible, which can reduce the number of passes and increase the production efficiency. In order to ensure the quality of the machined surface, a small amount of finishing allowance may be left, generally 0.2 to 0.5 mm. In short, the specific value of the cutting amount should be determined by analogy based on machine tool performance, related manuals and practical experience.
At the same time, the spindle speed, cutting depth and feed speed can be adapted to each other to form the optimal cutting amount.
The cutting amount is not only an important parameter that must be determined before the machine tool is adjusted, but also whether the value is reasonable or not has a very important influence on the processing quality, processing efficiency, and production cost.
The so-called "reasonable" cutting amount refers to the full use of tool cutting performance and machine power performance (power, torque), under the premise of ensuring quality, to obtain high productivity and low processing costs of the cutting amount.
(1) the processing of the above working procedure can not affect the positioning and clamping of the next working procedure.
(2) First inside and outside, That is, the inner cavity (inner hole) is processed first, and then the outer shape is processed.
⑶ Processes that are processed by the same tool or the same tool are preferably carried out continuously to reduce errors caused by repositioning or tool changing.
(4) In the same installation, the process that has little effect on the rigidity of the workpiece should be performed first.
Processing route
The CNC lathe feed processing route means that the turning tool begins its movement from the tool setting point (or the fixed origin of the machine tool) until it returns to that point and ends the machining program. Path through, including knives Cut in, cut out and a non-cutting free travel path.
The feed path for finishing is basically carried out along the outline of its parts. Therefore, the main focus of determining the feed path is to determine the feed route for roughing and empty travel.
In CNC lathe processing, the determination of processing routes generally follows the following principles:
1. The accuracy and surface roughness of the workpiece to be machined should be guaranteed.
2. Minimize the processing route, reduce the idle travel time, and improve the processing efficiency.
3. Simplify the workload of numerical calculation as much as possible and simplify the processing procedure.
4. For some programs reusable, use subroutines.

Making the processing program have the shortest feeding route not only saves the execution time of the entire machining process, but also reduces unnecessary tool consumption and wear of sliding parts of the machine feed mechanism. The type of shortest route and its implementation are as follows:
(1) The shortest cutting feed route. The shortest cutting feed path can effectively increase production efficiency and reduce tool wear. When arranging the shortest cutting feed route, it is also necessary to ensure the rigidity and workability of the workpiece.
(2) The shortest noncutting stroke route.
Using knife points. Generally rectangular loop exemplary manner roughing. The tool point A is set in consideration of the need for a convenient tool change during the finishing process, and therefore is set at a position far from the blank, At the same time, the starting point coincides with the tool point.
Set up a tool change point skillfully. In order to consider the convenience and safety of tool change, sometimes the tool change point is also set at a distance from the blank part.
At the location, then, when the second knife is changed, the course of noncutting stroke during finishing is bound to be longer; If the tool change point of the second knife is also set in the middle point position, the noncutting stroke distance can be shortened.
Reasonably arrange the "zero return" route. When manually compiling complex contour machining programs, the calculation process is simplified for easy verification. The programmer sometimes sets the end point of the tool after each tool is processed, By executing a "return to zero" operation instruction, all of them are returned to the position of the tool-cutting point, and then the subsequent program is executed. This will increase the distance of the feeding route and reduce the production efficiency. Therefore, the distance between the end point of the previous knife and the starting point of the next knife should be as short as possible when the “zero return” route is reasonably arranged. Or zero to meet the shortest requirements of the feed route. In addition, when choosing to return to the tool-cutting point instruction, the two-way simultaneous “return-to-zero” instruction of the x-axis and z-axis is used as far as possible without interference, and the “return-to-zero” route of this function is the shortest.
(3) Large margin rough ladder cutting feed line. The cutting feed routes of two kinds of large blank are listed. It is the wrong step cutting line, cutting in the order of 1 bucket 5, the remaining amount of each cutting is equal, it is the correct step cutting feed route. Because of the same back engagement of the cutting edge.
(4) Continuous cutting feed path for part contour finishing. The finishing of part contours can be arranged with one or several knife finishing operations. Its finished profile should be continuously machined from the last knife. At this time, the position of the tool should be selected properly. Try not to arrange cut in and cut out or change tools and pauses in continuous contours. So as to avoid sudden changes in cutting force and destroy the balance of process systems. This results in scratches, sudden changes in shape, or stagnation of the parts on the contour of the part.
(5) Special feed routes. In CNC turning, under normal circumstances. The longitudinal feed of the tool is fed along the negative direction of the coordinates. However, it is sometimes unreasonable to arrange a feeding route in its usual negative direction. It may even damage the workpiece.
Advantages and disadvantages
CNC machining has the following advantages:
1. The number of frocks is greatly reduced, and parts with complex shapes do not require complicated frocks. If you want to change the shape and size of parts, you only need to modify the parts processing program, which is suitable for the development and modification of new products.
2. The processing quality is stable, the processing precision is high, and the repeat accuracy is high, and it can meet the processing requirements of the aircraft.
3. The high production efficiency in the case of multi-variety and small-batch production can reduce the time for production preparation, machine tool adjustment and process inspection, and reduce the cutting time due to the use of the optimum cutting amount.
4. Machinable complex surfaces that are difficult to process with conventional methods can be machined, and even machined parts that are not observable can be machined.n The disadvantage of CNC machining is that machine tool equipment is expensive and requires maintenance personnel to have a high level.
Tool Selection
1, choose the principle of CNC tool
Tool life is closely related to the amount of cutting. When setting the cutting amount, a reasonable tool life should be selected first, and a reasonable tool life should be determined according to the optimization goal. It is generally divided into the highest productivity tool life and the lowest cost tool life. The former is determined based on the goal with the least amount of work time per unit and the latter is determined based on the goal with the lowest process cost.
Tool life depending on the complexity of the tool, the manufacturing and the cost of sharpening.
The complex and high-precision tool life should be selected to be higher than the single-edged tool. For the machine tool with indexable tools, due to the short tool change time, in order to give full play to its cutting performance and improve the production efficiency, the tool life can be selected to be lower, generally take 15-30min.
For multi-knife, machine tool and automated machining tools that are more complex for tool loading, tool change and tool adjustment. The tool life should be selected higher, and in particular tool reliability should be ensured.
When the productivity of a certain process in a workshop limits the productivity of the whole workshop, the tool life of the process is selected to be lower. When the expenditure of the whole plant shared by a certain process unit unit time is relatively large, the tool life should also be selected lower.
In the case of large-scale finishing, in order to ensure that at least one pass is to be performed to avoid mid-tool change during cutting, the tool life should be determined according to the part accuracy and surface roughness.
Compared with the ordinary machine tool processing method, the numerical control processing puts forward higher requirements on the tool, not only needs a good, high precision, but also requires a stable size, high durability, The disconnection and row performance also require easy installation and adjustment to meet the high efficiency requirements of CNC machine tools. The tools selected for CNC machine tools are often used for high-speed cutting tool materials (such as high-speed steel, ultra-fine grained carbide) and use indexable inserts.
2, Choose the tool for CNC turning

CNC lathe turning tool commonly used general points: forming lathe tool, sharp turning tool, arc turning tool and five kinds.
Molding turning tools are also called model turning tools. The contour shape of the machining parts is completely determined by the shape and size of the turning edge of the turning tool.In CNC turning, common turning tools include small-radius arc cutters, non-rectangular slot cutters, and thread cutters.In CNC machining, the Molding tool should be used as little or as little as possible.
The sharp turning tool is a turning tool characterized by a straight cutting edge. The tip of a turning tool of this type consists of straight main and auxiliary cutting edges. The internal and external turning tool 900, the left and right end face turning, grooving (cutting) tools and a variety of small chamfered tip and the cylindrical hole tools.The method of selecting the geometric parameters (mainly geometric angles) of the sharp turning tool is basically the same as that of ordinary turning.
However, comprehensive consideration should be given to the characteristics of CNC machining (such as processing routes, processing interference, etc.), and the strength of the tool tip itself should be taken into account.
3, Select the tool for CNC milling
In the numerical control machining, the inner and outer contours of the milling plane parts and the milling plane are commonly used flat bottom end mills. The empirical data of the relevant parameters of the tool are as follows:
One is that the cutter radius RD should be smaller than the minimum radius of curvature Rmin of the inner contour surface of the part, generally taking RD=(0.8-0.9)Rmin.
The second is the processing height of the part H<(1/4-1/6)RD to ensure that the knife has sufficient rigidity.
Third, when milling the bottom of the inner groove with a flat-bottom end mill, the bottom edge of the groove needs to be overlapped by two passes, and the radius of the cutting edge of the tool Re=R-r, that is, the diameter is d=2Re=2(R-r), The radius of the tool is taken as Re=0.95 (Rr) when programming.
For some three-dimensional surface and variable angle profile processing, spherical milling cutters, ring milling cutters, drum milling cutters, conical milling cutters and disc milling cutters are often used.

In addition, for the selected tool, the tool size must be strictly measured to obtain accurate data before use. The operator enters this data into the data system and completes the machining process by calling the program, thereby producing a qualified workpiece.

Knife point
From where did the tool start to move to the specified position?
Therefore, at the beginning of program execution, the position of the tool in the workpiece coordinate system must be determined. This position is the starting point of the tool relative to the workpiece during program execution. So it is called the starting point of the program or the point of the knife.
This starting point is generally determined by the knife, so this point is also called the knife point. When programming, it is necessary to correctly select the position of the tool point. The principle of setting tool points is to facilitate numerical processing and simplify programming. Easy to correct and easy to check during processing; resulting in small machining errors. The tool-cutting point can be set on the machined part, or on the fixture or the machine tool. In order to improve the machining accuracy of the part, the tool-cutting point should be set as far as possible on the design basis of the part or the process base.
When the machine tool is actually operated, the knife position of the tool can be placed on the tool setting point by manually setting the tool. That is, the "knife location" and the "cutting point" coincide.
The so-called "knife location" refers to the tool's positioning reference point. The turning tool's tool location is the tool nose or the tool nose arc center.
The flat end milling cutter is the intersection point the tool axis and the tool bottom surface; the ball end milling cutter is the ball center of the ball head, and the drill bit is the drill point.
With manual knife operation, the accuracy of the tool is low and the efficiency is low. Some factories use optical alignment tool, tool aligner and automatic tool setting device to reduce tool setting time and raise the accuracy of tool setting.
When a tool change is required during machining, the tool change point should be specified. The so-called "tool change point" refers to the tool change position when the holder is rotated, the tool change should be located outside the workpiece or fixture, do not touch the workpiece and the other to tool change components shall prevail.
Cutting amount
In NC programming, the programmer must determine the amount of cutting for each process and write the program in the form of instructions. Cutting rates include spindle speed, depth of cut, and feed rate. For different processing methods, different cutting amounts need to be selected. The selection principle of cutting amount is to ensure the precision and surface roughness of the part and fully exploit the cutting performance of the tool. Ensure a reasonable tool life and give full play to the machine's performance, maximize productivity and reduce costs.
1, Determine the spindle speed
The spindle speed should be selected based on the allowable cutting speed and the workpiece (or tool) diameter. Its calculation formula is: n = 1000 v/7 1D Type: v? Cutting speed, unit is m/m moving, decided by the tool's durability; n One spindle speed, in r/min, D is the workpiece diameter or tool diameter in mm. Calculate the spindle speed, n, and finally select the machine's own or nearer speed.

2, Determine the feed rate
The feed rate is an important parameter in the cutting amount of CNC machine tools. It is mainly selected based on the machining accuracy and surface roughness requirements of the parts and the material properties of the tools and workpieces. The maximum feed rate is limited by the stiffness of the machine and the performance of the feed system.
The principle of determining the feed rate: When the quality requirements of the workpiece can be guaranteed, in order to increase the production efficiency, a higher feed rate can be selected. Generally within the range of 100 to 200mm/min;
When cutting, processing deep holes or machining with high-speed steel tools, lower feed rates should be selected, generally within the range of 20 to 50 mm/min;
When the processing precision and surface roughness requirements are high, the feed speed should be chosen smaller, generally within the range of 20--50mm/min;
When the tool is idle, especially when it is "return to zero" at a long distance, the highest feedrate set by the machine's numerical control system can be set.
3, Determine the depth of cut
The depth of cut is determined by the stiffness of the machine, the workpiece and the tool. When the stiffness allows, the depth of cut should be equal to the machining allowance of the workpiece as much as possible, which can reduce the number of passes and increase the production efficiency. In order to ensure the quality of the machined surface, a small amount of finishing allowance may be left, generally 0.2 to 0.5 mm. In short, the specific value of the cutting amount should be determined by analogy based on machine tool performance, related manuals and practical experience.
At the same time, the spindle speed, cutting depth and feed speed can be adapted to each other to form the optimal cutting amount.
The cutting amount is not only an important parameter that must be determined before the machine tool is adjusted, but also whether the value is reasonable or not has a very important influence on the processing quality, processing efficiency, and production cost.
The so-called "reasonable" cutting amount refers to the full use of tool cutting performance and machine power performance (power, torque), under the premise of ensuring quality, to obtain high productivity and low processing costs of the cutting amount.


