Analysis of Several Deformation Causes of Machined Aluminum Alloy Parts?
The problem of workpiece deformation in the machining of aluminum alloy parts is a difficult problem to solve. First, you must analyze the cause of the deformation before you can take countermeasures.
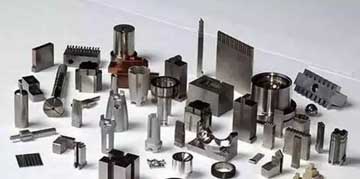
1, The material and structure of the workpiece will affect the deformation of the workpiece.
The amount of deformation is proportional to the complexity of the shape, the aspect ratio and the thickness of the wall, and is proportional to the rigidity and stability of the material. Therefore, in the design of parts to reduce the influence of these factors on the deformation of the workpiece as possible.
Especially in the structure of large parts, the structure should be reasonable. Before processing, the defects such as hardness and porosity of the blank should be strictly controlled to ensure the quality of the blank and reduce the deformation of the workpiece.
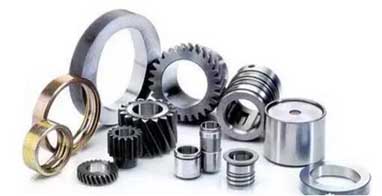
2, Deformation caused by workpiece clamping
When clamping the workpiece, first select the correct clamping point and then select the appropriate clamping force according to the position of the clamping point.
So as far as possible, the clamping point and the supporting point are consistent, so that the clamping force acts on the support. The clamping point should be as close as possible to the working surface, and the position where the force is not easy to cause the clamping deformation is selected. When there are clamping forces in several directions on the workpiece, the order of the clamping forces should be considered. The clamping force should be applied first to make the workpiece and the support contact, and it should not be too large. For the main clamping force that balances the cutting force, it should be applied at the end.
Secondly, the contact area between the workpiece and the clamp should be increased or the axial clamping force should be used. Increasing the rigidity of the part is an effective way to solve the clamping deformation, but due to the shape and structure of the thin-walled part, it has a lower rigidity. In this way, deformation occurs due to the application of the clamping force.
Increasing the contact area between the workpiece and the fixture can effectively reduce the deformation of the workpiece when it is clamped. For example, when milling thin-walled parts, a large number of elastic pressure plates are used, in order to increase the force-receiving area of the contact parts; When turning the inner diameter and outer circle of a thin-walled sleeve, whether using a simple open transition ring, or using elastic mandrel, arc clamp, etc., are used to increase the contact area of workpiece clamping. This method is advantageous for carrying the clamping force and thus avoiding deformation of the part. The axial clamping force is also widely used in production. The special fixture for designing and manufacturing can make the clamping force act on the end face, which can solve the bending deformation of the workpiece caused by the thin wall of the workpiece and the poor rigidity.
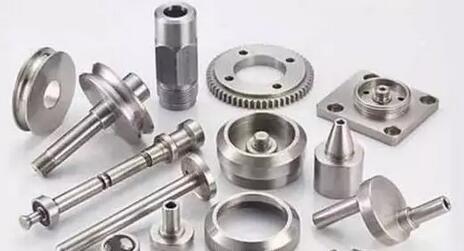
3, Deformation caused by workpiece machining
The elastic deformation of workpiece in the direction of force due to the action of cutting force in the cutting process is what we often call the knife-letting phenomenon.
In response to such deformations, corresponding measures should be taken on the tool, cutting tool sharpness is required in finishing. On the one hand, it can reduce the friction resistance between the tool and the workpiece, on the other hand, it can improve the heat dissipation ability of the tool when cutting the workpiece, thereby reducing the residual internal stress on the workpiece. For example, when milling a large plane of a thin-walled part, using a single-edge milling method, the tool parameters select a larger lead angle and a larger rake angle in order to reduce the cutting resistance. Due to the light cutting speed of the tool, the deformation of the thin-walled parts is reduced, and it is widely used in production.
In the turning of thin-walled parts, a reasonable tool angle is critical for the amount of cutting force during turning, the thermal deformation during turning, and the microscopic quality of the workpiece surface. The size of the rake angle of the tool determines the degree of cutting deformation and the sharpness of the rake angle of the tool. Large rake angle reduces cutting deformation and friction, but too large rake angle reduces the wedge angle of the tool, reduces the strength of the tool, reduces the heat dissipation of the tool and accelerates wear. Therefore, when turning thin-walled parts of steel materials, use high-speed tools, the front angle is 6 ° ~ 30 °, with carbide tools, the front angle is 5 ° ~ 20 °.
The back angle of the tool is large, the friction is small, and the cutting force is also reduced accordingly. However, if the back angle is too large, the tool strength will be weakened. When turning thin-walled parts, use a high-speed steel turning tool, and the back angle of the tool is 6°~12°. Carbide cutting tools, taking the angle of 4 ° ~ 12 °. Take a larger back angle when Fine turning and a smaller back angle when roughing. When turning the inner and outer circles of thin-walled parts, take a large lead angle. Proper selection of the tool is a necessary condition for the deformation of the workpiece.
The heat generated by the friction between the tool and the workpiece during machining also deforms the workpiece, so high-speed machining is often selected. In high-speed machining, since the chips are cut off in a short time, most of the cutting heat is carried away by the chips, which reduces the thermal deformation of the workpiece; Secondly, in the high-speed machining, due to the reduction of the softened portion of the cutting layer material, the deformation of the part processing can also be reduced, which is advantageous for ensuring the size and shape accuracy of the part. In addition, the cutting fluid is mainly used to reduce the friction during cutting and to reduce the cutting temperature. Reasonable use of cutting fluid plays an important role in improving tool durability, machining surface quality and machining accuracy. Therefore, it is necessary to use a sufficient cutting fluid in order to prevent deformation of the part during processing.
The use of reasonable cutting amounts in machining is a key factor in ensuring part accuracy. In the case of thin-walled parts with high processing precision, symmetric machining is generally adopted to equalize the stress generated on the opposite sides to reach a stable state, and the workpiece is smooth after processing. However, when a larger cutting tool amount is adopted in a certain process, the workpiece will be deformed due to the unbalance of tension stress and compression stress.
Deformation of thin-walled parts during turning is multifaceted. The clamping force when clamping the workpiece, the cutting force when cutting the workpiece, the workpiece hinders the elastic deformation and plastic deformation generated during the cutting of the tool, and the temperature in the cutting zone is increased to cause thermal deformation. Therefore, when we want rough machining, the cutting depth and feed can be larger. When finishing, the amount of the knife is generally 0.2 to 0.5 mm, the feed amount is generally 0.1 to 0.2 mm/r, or even smaller, and the cutting speed is 6 to 120 m/min. Use the highest cutting speed when finishing the car, but it is not easy to be too high. Reasonably choose the cutting amount to achieve the purpose of reducing part deformation.
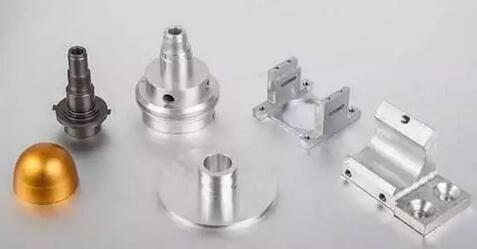
4, Stress deformation after processing
After processing, the parts themselves have internal stresses. These internal stress distributions are a relatively balanced state, and the parts are relatively stable in shape. However, after removing some materials and changing the internal stress after heat treatment, the workpiece needs to reach the balance of force again, so the shape changes. To solve such deformation, the workpiece to be straightened can be stacked to a certain height by a heat treatment method, and pressed into a flat state by a certain tooling. Then, the tooling and the workpiece are placed together in the heating furnace, and different heating temperatures and heating times are selected according to the materials of the parts. After the heat is straightened, the internal structure of the workpiece is stable. At this time, the workpiece not only has a high straightness, but also the work hardening phenomenon is eliminated, which further facilitates further finishing of the part. To do casting aging treatment, try to eliminate the internal residual stress, and then using the modification processing methods, i.e., roughing - Aging - reprocessing.
For large parts, profiling is required. That is, the amount of deformation of the workpiece after assembly is expected, and the amount of deformation is reserved in the opposite direction during processing, which can effectively prevent deformation of the part after assembly.
In summary, for the easily deformable workpiece, the corresponding countermeasures should be adopted in the blank and the processing technology. It is necessary to analyze according to different situations, and a suitable process route will be found.

1, The material and structure of the workpiece will affect the deformation of the workpiece.
The amount of deformation is proportional to the complexity of the shape, the aspect ratio and the thickness of the wall, and is proportional to the rigidity and stability of the material. Therefore, in the design of parts to reduce the influence of these factors on the deformation of the workpiece as possible.
Especially in the structure of large parts, the structure should be reasonable. Before processing, the defects such as hardness and porosity of the blank should be strictly controlled to ensure the quality of the blank and reduce the deformation of the workpiece.

2, Deformation caused by workpiece clamping
When clamping the workpiece, first select the correct clamping point and then select the appropriate clamping force according to the position of the clamping point.
So as far as possible, the clamping point and the supporting point are consistent, so that the clamping force acts on the support. The clamping point should be as close as possible to the working surface, and the position where the force is not easy to cause the clamping deformation is selected. When there are clamping forces in several directions on the workpiece, the order of the clamping forces should be considered. The clamping force should be applied first to make the workpiece and the support contact, and it should not be too large. For the main clamping force that balances the cutting force, it should be applied at the end.
Secondly, the contact area between the workpiece and the clamp should be increased or the axial clamping force should be used. Increasing the rigidity of the part is an effective way to solve the clamping deformation, but due to the shape and structure of the thin-walled part, it has a lower rigidity. In this way, deformation occurs due to the application of the clamping force.
Increasing the contact area between the workpiece and the fixture can effectively reduce the deformation of the workpiece when it is clamped. For example, when milling thin-walled parts, a large number of elastic pressure plates are used, in order to increase the force-receiving area of the contact parts; When turning the inner diameter and outer circle of a thin-walled sleeve, whether using a simple open transition ring, or using elastic mandrel, arc clamp, etc., are used to increase the contact area of workpiece clamping. This method is advantageous for carrying the clamping force and thus avoiding deformation of the part. The axial clamping force is also widely used in production. The special fixture for designing and manufacturing can make the clamping force act on the end face, which can solve the bending deformation of the workpiece caused by the thin wall of the workpiece and the poor rigidity.

3, Deformation caused by workpiece machining
The elastic deformation of workpiece in the direction of force due to the action of cutting force in the cutting process is what we often call the knife-letting phenomenon.
In response to such deformations, corresponding measures should be taken on the tool, cutting tool sharpness is required in finishing. On the one hand, it can reduce the friction resistance between the tool and the workpiece, on the other hand, it can improve the heat dissipation ability of the tool when cutting the workpiece, thereby reducing the residual internal stress on the workpiece. For example, when milling a large plane of a thin-walled part, using a single-edge milling method, the tool parameters select a larger lead angle and a larger rake angle in order to reduce the cutting resistance. Due to the light cutting speed of the tool, the deformation of the thin-walled parts is reduced, and it is widely used in production.
In the turning of thin-walled parts, a reasonable tool angle is critical for the amount of cutting force during turning, the thermal deformation during turning, and the microscopic quality of the workpiece surface. The size of the rake angle of the tool determines the degree of cutting deformation and the sharpness of the rake angle of the tool. Large rake angle reduces cutting deformation and friction, but too large rake angle reduces the wedge angle of the tool, reduces the strength of the tool, reduces the heat dissipation of the tool and accelerates wear. Therefore, when turning thin-walled parts of steel materials, use high-speed tools, the front angle is 6 ° ~ 30 °, with carbide tools, the front angle is 5 ° ~ 20 °.
The back angle of the tool is large, the friction is small, and the cutting force is also reduced accordingly. However, if the back angle is too large, the tool strength will be weakened. When turning thin-walled parts, use a high-speed steel turning tool, and the back angle of the tool is 6°~12°. Carbide cutting tools, taking the angle of 4 ° ~ 12 °. Take a larger back angle when Fine turning and a smaller back angle when roughing. When turning the inner and outer circles of thin-walled parts, take a large lead angle. Proper selection of the tool is a necessary condition for the deformation of the workpiece.
The heat generated by the friction between the tool and the workpiece during machining also deforms the workpiece, so high-speed machining is often selected. In high-speed machining, since the chips are cut off in a short time, most of the cutting heat is carried away by the chips, which reduces the thermal deformation of the workpiece; Secondly, in the high-speed machining, due to the reduction of the softened portion of the cutting layer material, the deformation of the part processing can also be reduced, which is advantageous for ensuring the size and shape accuracy of the part. In addition, the cutting fluid is mainly used to reduce the friction during cutting and to reduce the cutting temperature. Reasonable use of cutting fluid plays an important role in improving tool durability, machining surface quality and machining accuracy. Therefore, it is necessary to use a sufficient cutting fluid in order to prevent deformation of the part during processing.
The use of reasonable cutting amounts in machining is a key factor in ensuring part accuracy. In the case of thin-walled parts with high processing precision, symmetric machining is generally adopted to equalize the stress generated on the opposite sides to reach a stable state, and the workpiece is smooth after processing. However, when a larger cutting tool amount is adopted in a certain process, the workpiece will be deformed due to the unbalance of tension stress and compression stress.
Deformation of thin-walled parts during turning is multifaceted. The clamping force when clamping the workpiece, the cutting force when cutting the workpiece, the workpiece hinders the elastic deformation and plastic deformation generated during the cutting of the tool, and the temperature in the cutting zone is increased to cause thermal deformation. Therefore, when we want rough machining, the cutting depth and feed can be larger. When finishing, the amount of the knife is generally 0.2 to 0.5 mm, the feed amount is generally 0.1 to 0.2 mm/r, or even smaller, and the cutting speed is 6 to 120 m/min. Use the highest cutting speed when finishing the car, but it is not easy to be too high. Reasonably choose the cutting amount to achieve the purpose of reducing part deformation.

4, Stress deformation after processing
After processing, the parts themselves have internal stresses. These internal stress distributions are a relatively balanced state, and the parts are relatively stable in shape. However, after removing some materials and changing the internal stress after heat treatment, the workpiece needs to reach the balance of force again, so the shape changes. To solve such deformation, the workpiece to be straightened can be stacked to a certain height by a heat treatment method, and pressed into a flat state by a certain tooling. Then, the tooling and the workpiece are placed together in the heating furnace, and different heating temperatures and heating times are selected according to the materials of the parts. After the heat is straightened, the internal structure of the workpiece is stable. At this time, the workpiece not only has a high straightness, but also the work hardening phenomenon is eliminated, which further facilitates further finishing of the part. To do casting aging treatment, try to eliminate the internal residual stress, and then using the modification processing methods, i.e., roughing - Aging - reprocessing.
For large parts, profiling is required. That is, the amount of deformation of the workpiece after assembly is expected, and the amount of deformation is reserved in the opposite direction during processing, which can effectively prevent deformation of the part after assembly.
In summary, for the easily deformable workpiece, the corresponding countermeasures should be adopted in the blank and the processing technology. It is necessary to analyze according to different situations, and a suitable process route will be found.


