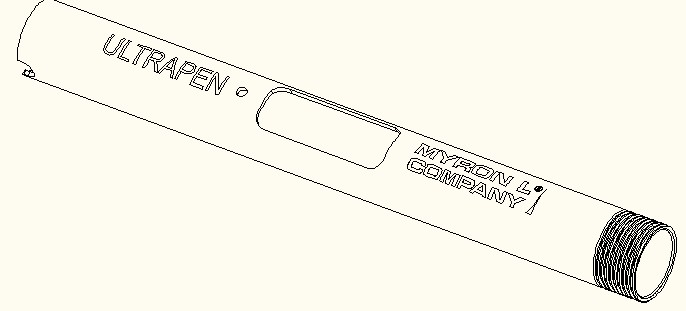
CNC Machining High-precision Aluminum Housing Samples

The product requirements are strictly analyzed as follows:
#A and #B, the larger U-Notch and the smaller U-Notch:
• The center line of either Notch should go through the axis (within 0.001”)
• Two side walls of either Notch should be sysmetrical to the center line (within 0.001”)
#1, Material Cert - composition and mechanical properties.
#2, Laser etched text should be consistent from place to place, part to part and lot to lot. Supplier should document etching parameters.
#3, follow note #4 but please don’t over-do.
#4, please provide cert on the special processing.
#5, Conduct chemical tests per MPS-540WT. If possible please provide SDS orMSDS for the ink (paint).
#6, YYWWS where S = supplier code. P is assigned to Polytronix Electronics. If the enclosure is laser engraved on 2/28/2017, the mfg date code = 1709P.
#7, NO BREAK PERMISSIBLE in the dimple. Supplier needs to inspect this feature a sampling plan of C=0, 0.10 or tighter right after the stamping operations of the dimple.
#8, LCD window and LED hole should not be deburred yet does not cut operator’s finger.
#9, please inform MLC if PE has difficulty in finding proper Dove Tail Cutter.
#10, using Go/No Go plug gauge for this inspection
#11, OD, nominal dimension close to 0.625” is ideal in order to mate with Pen Clip.
#12, PE might need to do some experiment in order to meet this spec.
#13, making sure that the overall angle of the cutter is 120 degree.
#14, the chamfer in these four places are critical to our next level assembly – burrs are not permissible.
#15, Go/No Go thread gauge (ring gauge) should be used to inspect the thread (2A)
#16, the LCD window should be parallel to the axis and sysmetrical to the LED hole, within 0.002”.
#17, the LCD window should be perpendicular to the center line of two notches within 0.25 degree.
#18, the Dimple should be perpendicular to the center line of two notches within 0.25 degree.
#19, Logo should be parallel and symmetrical to the LCD window Logo
#20, making sure that .25” from end up inside the tube must pass corrosion test
#21, making sure that chamfers are added to both inside and outside of the tube.
#22,Logo should be parallel and symmetrical to the LCD window. Logo
#23, Conduct cosmetic inspection per MPS-537WT.
#24, Provide RoHS compliance cert.


